iOS 15.6 palera1n — SSH via LAN
As mobile app security testers we use modified and jailbroken devices to do a lot of our testing; it allows us access to the filesystem, let’s us install tweaks for security mechanisms like SSL pinning and jailbreak detection, and allows use of Frida.
However, what do we do when we are tasked to security test an application which targets iOS 15 or above and all our current devices are jailbroken on iOS 14 — firstly, panic…
…secondly, figure out a new implementation.
There are not a lot of options to jailbreak for iOS 15 and above, however there is one, palera1n
palera1n is a developer-oriented jailbreak for checkm8 devices (A8-A11) on iOS 15.0–16.5.1 — https://palera.in/
The term here, ‘developer orientated’ is an interesting one, to me it conjurers up images of someone who understands almost everything they are doing, sat in a Terminal amending the open source code to get it working on their device. In general palera1n is very versatile and semi works out of the box for the devices it supports; the recent re-write to full C code has also made it more robust, streamlined and reliable, always a good thing when the downside is a bricked device.
There are numerous guides on how to install palera1n, and although we will cover that briefly, the main topic will be utilising SSH over the LAN on palera1n devices, because, out the box, this jailbreak is locked down to only allow USB. So here chronicles the steps to regain full SSH access to the device.
Installation*
*note, this process is on macOS
As mentioned, the method is now fairly seamless, open a Terminal and grab the install script.sudo /bin/sh -c "$(curl -fsSL https://static.palera.in/scripts/install.sh)"

Once installed, run the command, and follow the on-screen instructions:palera1n

Once completed and the idevice has rebooted, open the new palera1n app, you’ll be asked to set a password for any terminal commands and install Sileo, Zebra or both. Unfortunately it seems that the now teenage Cydia has finally died a death, but Sileo is rather good.
SSH fun
The only other issue is that although palera1n installs OpenSSH dependencies out of the box, it modifies the port to 44 (instead of the default 22) and doesn’t allow SSH over LAN.

Fair enough, we’ll get access via iproxy over USB (forwarding port 44 to 2222) and take a look at things. Of course the default SSH password is still the one we all know and love, alpine.
iproxy 2222 44 -u [device_uuid] &
ssh root@127.0.0.1 -p 2222


Great, so we’re in. When trying to SSH over the LAN before, the standard rsa authorized keys error popped up, but also that PasswordAuthentication had been disabled. Fine, we’ll turn it back on, except, due to the way palera1n works in its rootless mode, /etc/ssh/sshd_config doesn’t exist.
Wait, what?
Rootful and rootless
Generally, all jailbreaks up to this stage, and a few years prior have been rootful, they mount the / root filesystem as read/write and allow changes and modifications to this, and you have access to standard items like /etc, and /usr/bin.
This is in comparison to rootless, whereby access to the root user account is still achievable as seen, but everything is created virtually and stored within user folders, /var and /private/preboot. Nothing can be written to the main / root filesystem.
For those who work on both platforms, think of it like Android’s system and systemless rooting variations — Magisk
As this is still a fairly new concept, it’s taking tweak and jailbreak developers sometime to catch up; many tweaks don’t work with rootless jailbreaking and thus can leave you missing your favourite toolset… but it is improving, and rootless, like Android’s systemless, is definitely the way forward.
So now we now what we’re looking for, and where to find it:find / -name sshd_config -print

Once we have found it, simply use vim, to edit the file, and delete the commented out line, replacing it with the opposite, and saving.PasswordAuthentication yes

We should now be able to SSH in via LAN using password based auth, much like checkra1n did before, allowing easier access to the device for testing.
Hold the phone
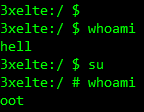
Not quite, after any jailbreak always change the default passwords, especially if doing the above and opening up SSH to the LAN, but trying to run passwd was met with the Killed error, and sudo didn’t exist at all, but, we already know exactly where these will be.find / -name sudo -print

Then add it to the device path:export PATH="/private/preboot/[digit_string]/jb-xxxxxx/procursus/usr/bin:$PATH"
With this in the path and access to more standard Linux binaries, sudo and passwd should now allow you to change default passwords and run as root.
Shells
When the device connects via iproxy and USB, it always drops into the basic shell, and has reset the $PATH variable AND passwords, due to rootless using standard sh located in /cores/binpack/bin/sh.
Any password changes done to the user accounts via LAN SSH are permanent and stay changed after exit, ensuring the device security.
It is possible to drop into zsh by simply running /var/jb/usr/bin/zsh from the sh prompt giving you access to a proper terminal.
By creating a .profile file in /private/var/root with the string for the zsh (/var/jb/usr/bin/zsh) the sh spawned on USB connection will automatically run zsh, dropping you directly into it allowing access to other binaries from coreutils. Thanks autom8on


Despite palera1n changing the port to SSH via USB, that standard port 22 over LAN works fine once enabled.


Job done.